Step 1: Get Started
- Once logged in, you will be directed to the dashboard.
- In the navigation menu, click on "Flows".
Step 2: Message Content
- Flow message name: Create a name for this message. It is recommended to make it describe and relate to the flow it will be sent in.
- Title: Enter a catchy title for your campaign
- Message: Write a compelling message for your audience.
- Link: Provide a URL that users will be directed to when they click on the message.
- Icon (optional): Upload an icon you want to use for your campaign. The fallback image will be the icon tha comes from your account.
- Image (optional): Provide an eye catching image for your campaign that displays depending on your browser and device type.
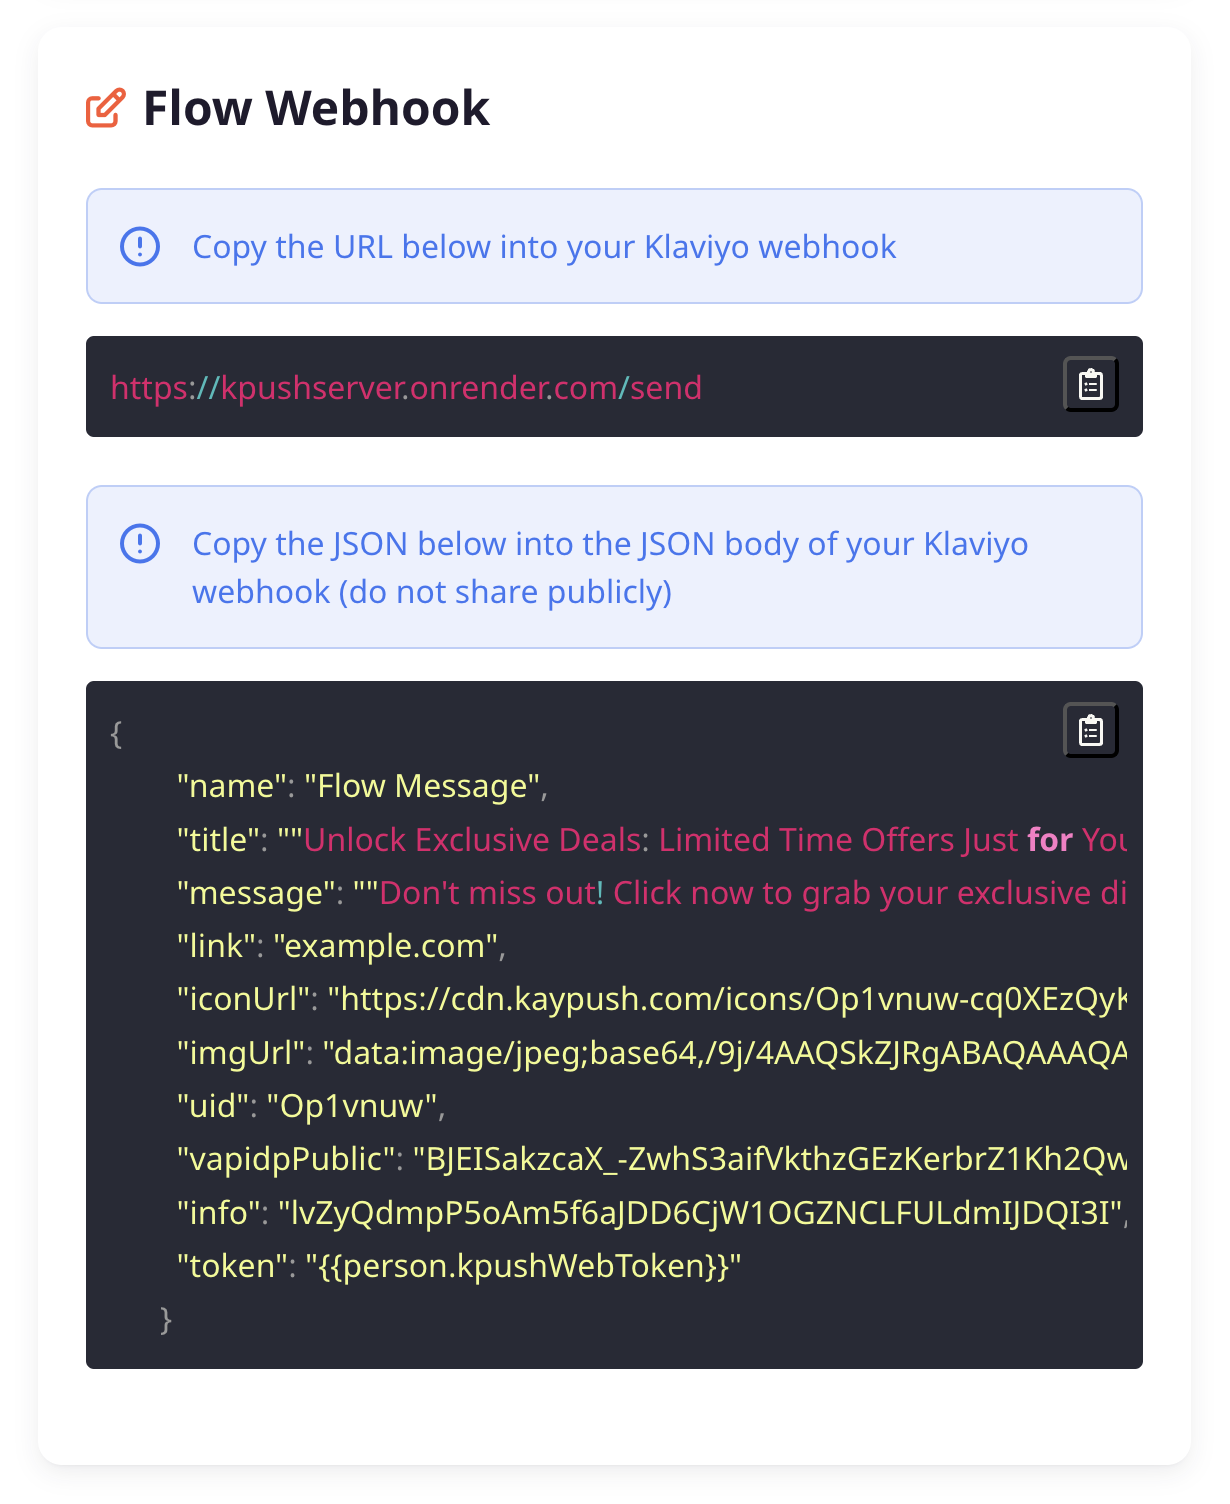
Step 3: Copy data into your Webhook
This guide assumes you have already created a flow and are ready to copy the data into your webhook. For more information about creating webhooks in Klaviyo please refer to this guide: Understanding webhooks in flows
- Copy the url and add it into the "Destination URL" field within the webhook in your flow.
- Copy the JSON data which holds the your push message content that you created above and paste it into the "JSON Body" section of your webhook in your flow.
Tips for a Successful Campaign
- Be Clear and Concise: Ensure your message is easy to understand and straight to the point.
- Use Engaging Media: Images and icons can significantly increase engagement.
- Test Before Launching: Always send a test message to catch any errors or issues.
- Monitor and Adjust: Use the performance metrics to make data-driven decisions for future campaigns.